Table of contents Toc Icon
Table of contents Toc Icon
MyPortal lets account owners manage user access from one place, which makes routine account changes quicker and easier. You can view the full user list, check active or disabled users, add a new user, or remove a user when they no longer need access.
Let’s now see how you can manage users with MyPortal.
A. View users
Step 1: Open MyPortal and log in to your account.
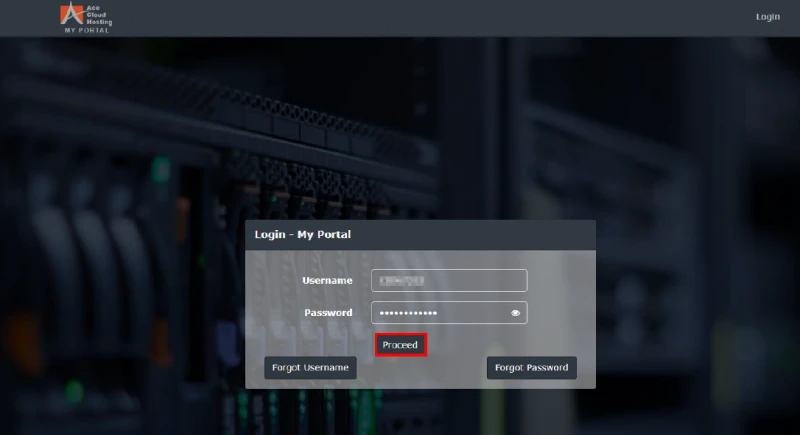
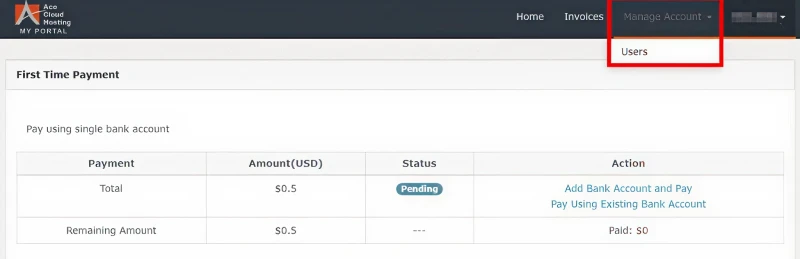
Step 2: Click Manage Account in the top-right corner and select Users.
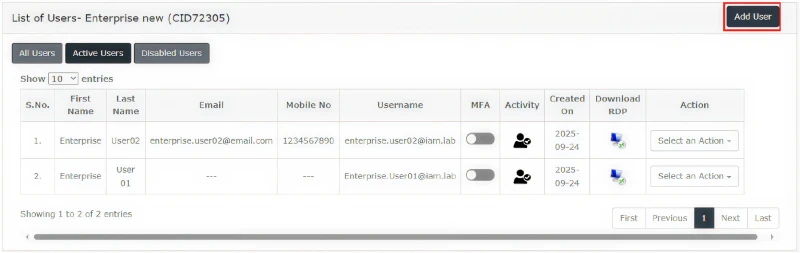
Step 3: The user list will open on the screen. This section gives you a quick view of all users linked to your account.
B. View active or disabled users
Step 1: Go to the Users section.
Step 2: Choose the view you want, All Users, Active Users, or Disabled Users.
Step 3: Active Users is selected by default.
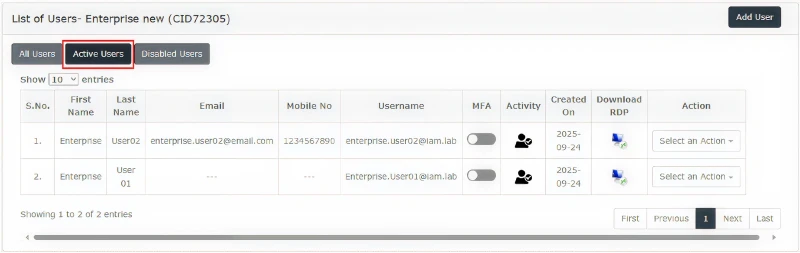
To view which users are disabled, switch to the “Disable Users” tab.
This helps you quickly separate users who currently have access from those who have already been disabled.
C. Adding New Users
Adding a user from MyPortal is useful when a new team member needs access, and you want to get their account ready without delay.
Follow these steps to add new users in MyPortal:
Step 1: In the Users section, click Add User.
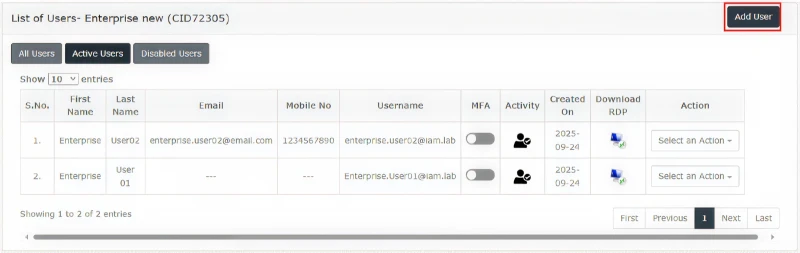
Step 2: Enter the required user details.
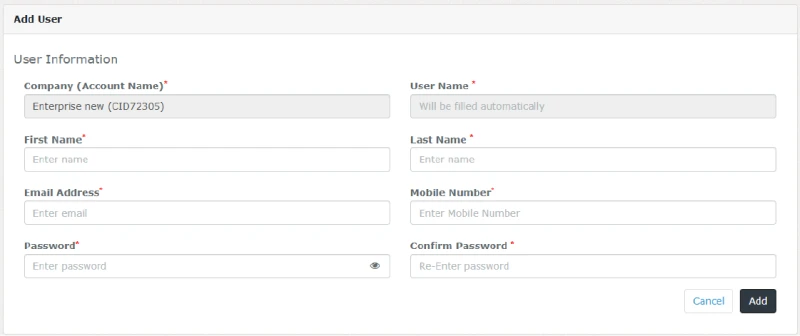
Step 3: Create and confirm the password.
Step 4: Click Add to save the new user.
Step 5: Keep the password strong and follow the required password rules.
D. Removing or disabling a user
Removing or disabling a user is useful when an employee leaves the company, changes roles, or no longer needs access to the server. This helps you keep user access under control and makes sure only the right people can use the account resources.
Follow these steps to remove or disable a user in MyPortal:
Step 1: Go to the Users section in MyPortal and look for the user account you want to remove or disable and find the user in the list.
Step 2: Choose Select an Action next to that user, as shown in the screenshot below.
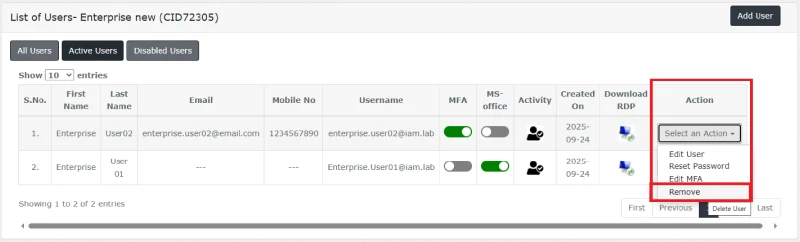
Step 3: Select Remove from the list of actions to start the process of disabling that user’s access.
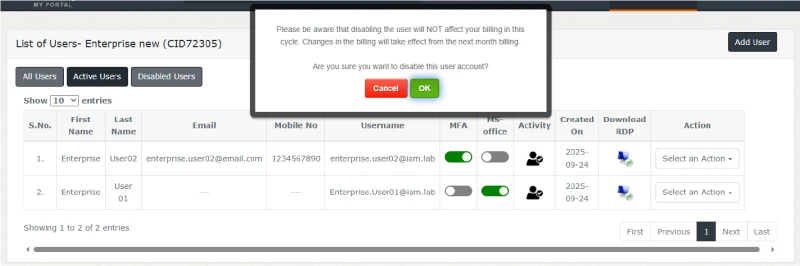
Step 4: A confirmation prompt will appear on the screen. Click OK to complete the action.
You can also review the user list from time to time to remove inactive accounts and keep access management clean and easy.
Need help?
If the option you need is not visible, or the change does not go through, the Ace Cloud Hosting support team is ready to help. Reach out to the team for help with user access, account settings, or any issue you face while managing users in MyPortal. Getting support at the right time can save effort and help your team stay on track.
By hosting QuickBooks on the cloud with us, you not only gain uninterrupted access to your accounting data but also unlock dedicated support designed to keep your business moving forward—without the errors or downtime.
Our experts are ready to assist with setup, troubleshooting, or any product issue. Get in touch now!