Table of contents Toc Icon
Table of contents Toc Icon
Making a printer your default makes sure that print jobs are automatically sent to it, saving you time and streamlining the printing process.
Learn how to set the default printer on the Ace server by following the below steps:
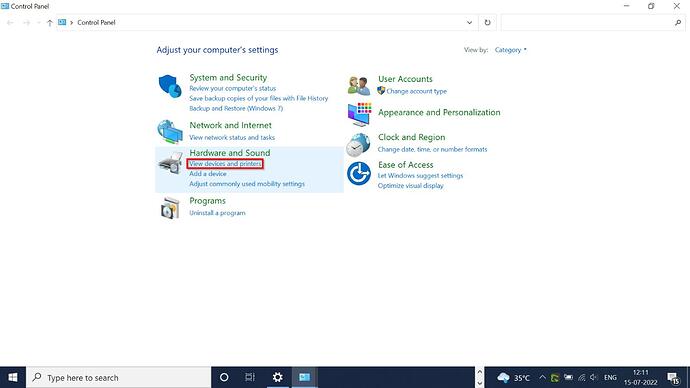
1. Go to Control Panel.
2. Choose View devices and printers under Hardware and Sound.
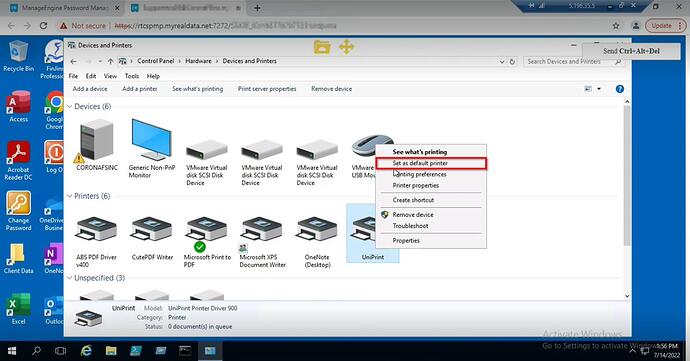
3. To set a printer as the default one on a server, perform a right-click and choose Set as default printer.
Benefits:
Here’re the 3 benefits of setting up the default printer on the Ace server:
- Streamlined printing: By setting a default printer on the Ace server, you can be sure that all print jobs will be sent to the chosen printer on autopilot. By doing this, the printing process is streamlined, and selecting a printer by hand for each print job is no longer necessary.
- Increased efficiency: By setting a default printer, users can send print jobs without looking for the right printer. This increases effectiveness and productivity by letting users concentrate on their jobs rather than choosing a printer.
- Simplified management: Management is made more accessible by a default printer on the Ace server for admins. They can set a specific printer as the default to guarantee that all network users will automatically utilize it for their printing requirements.
Conclusion:
The default printer can be set up by performing the step mentioned above, which streamlines and increases the productivity of printing for both users and administrators by optimizing printing operations, increasing efficiency, and enabling centralized printer administration.
If you’re still having trouble setting up the default printer on the Ace server and need more help, feel free to contact us at +1-855-223-4887.
Our experts are ready to assist with setup, troubleshooting, or any product issue. Get in touch now!