Table of contents Toc Icon
Table of contents Toc Icon
Introduction:
Today, we’re going to show you how to manage Ace Cloud Hosting Server users right from your billing portal. No techy talk-just straightforward steps to make user control simple.
From fine-tuning access to keeping things secure, we’ll cover it all. Let’s make your portal the go-to place for easy, efficient Ace Server user management.
What you will learn:
- How to Login to the Billing Portal:
- How to View Users:
- How to View Active/Disabled Users:
- How to Add a User:
- How to Remove/Disable a User:
Learn how to manage user access in My Portal by following the below steps:
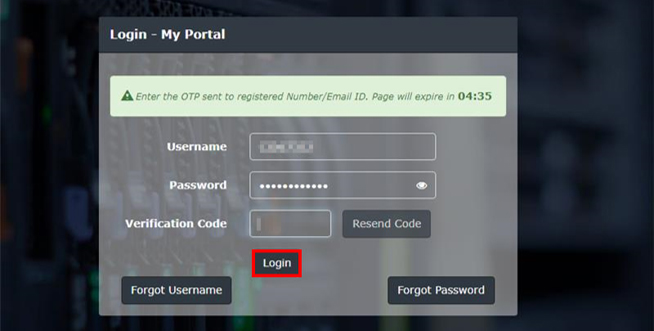
Step 1. How to Login to the Billing Portal:
- Click here to login to the ACE Cloud Portal.
- Enter your Username and Password and then click Proceed.

- Enter the Verification Code received over register Email ID/Phone Number and click Login.
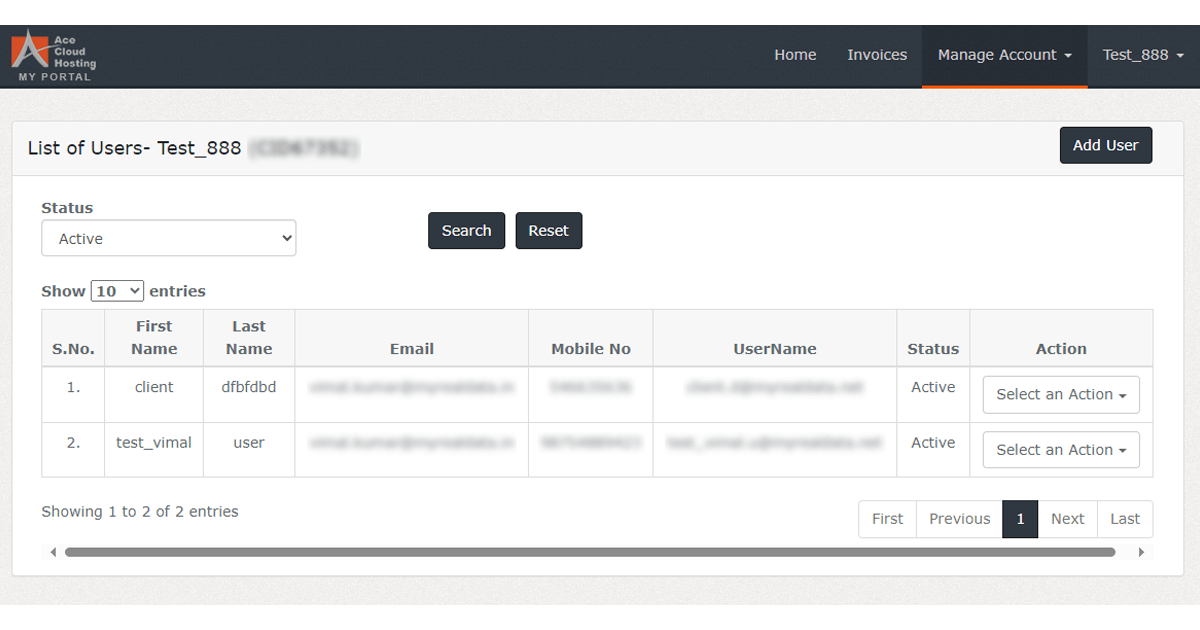
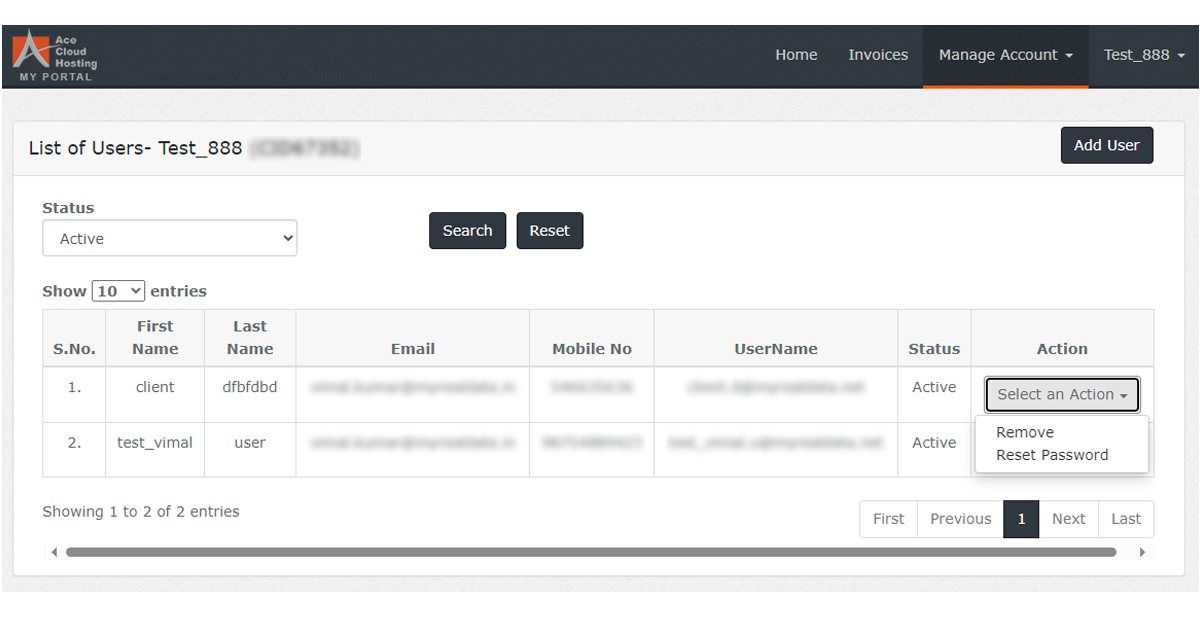
Step2. How to View Users:
- Click Manage Account and then select Users on the top-right corner of the portal.
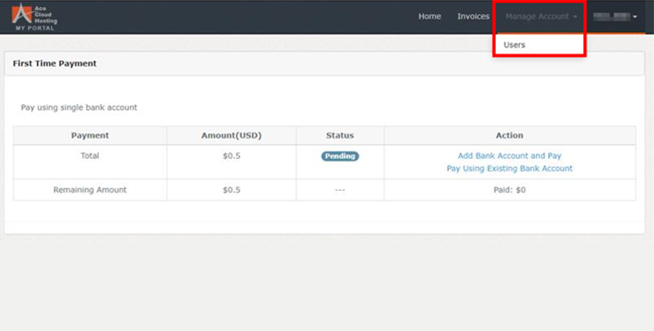
- Here you can view the list of users.
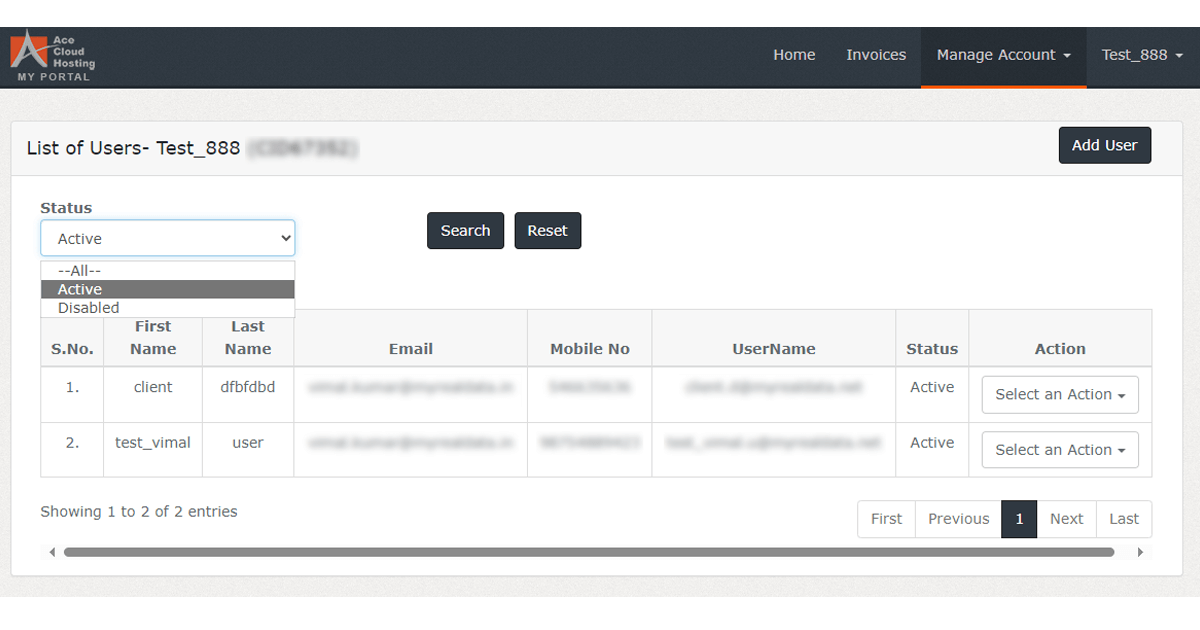
Step 3. How to View Active/Disabled Users:
- Click on Status dropdown.
- Select Active for active users and Disabled for disabled users.
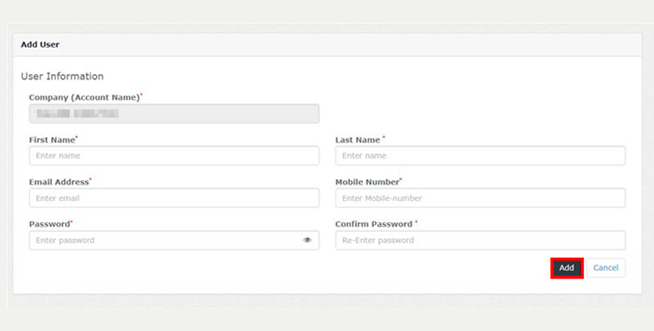
Step 4. How to Add a User:
- Click on Add User on the top-right corner.

- Enter the User Information and click Add.
Note: Maintain the complexity of the password.
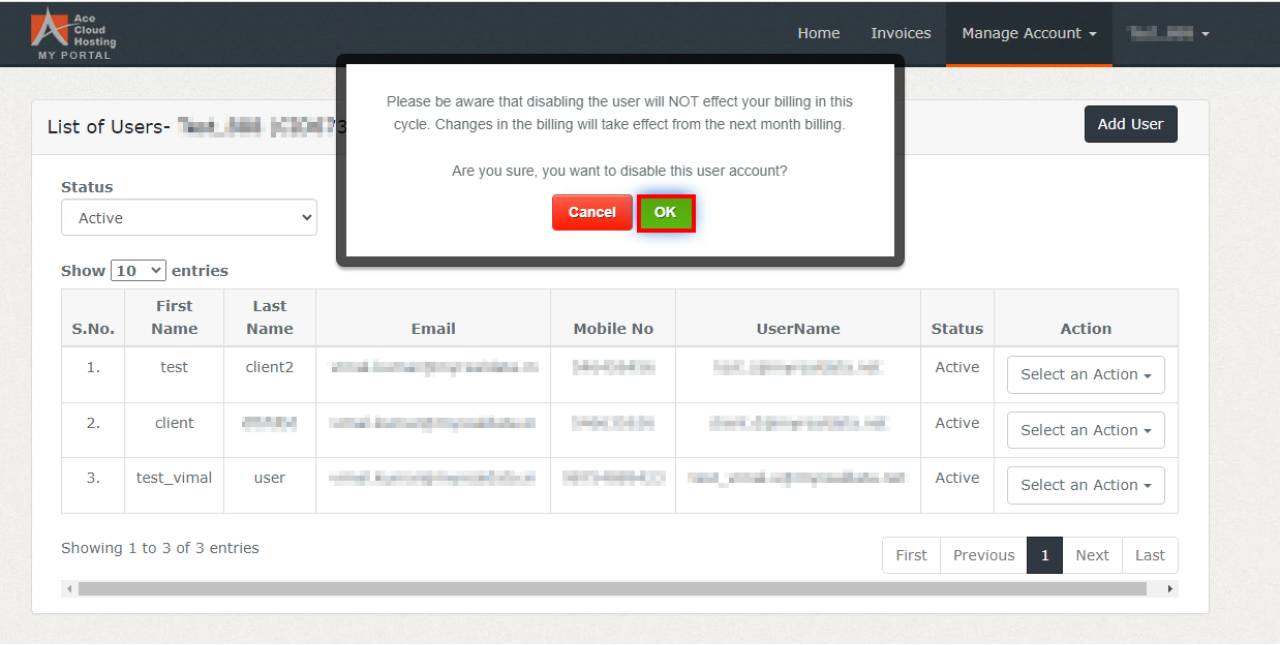
Step 5. How to Remove/Disable a User:
- Click on Select an Action against the user you want to remove/disable.
- Click Remove.
- Click OK to confirm the removal/disabling of user.
If you have any questions or need further assistance, please contact Ace Cloud Hosting support team today!
Still Need Help? We’re Here For You!
Our experts are ready to assist with setup, troubleshooting, or any product issue. Get in touch now!
Find Ace Cloud Hosting on: